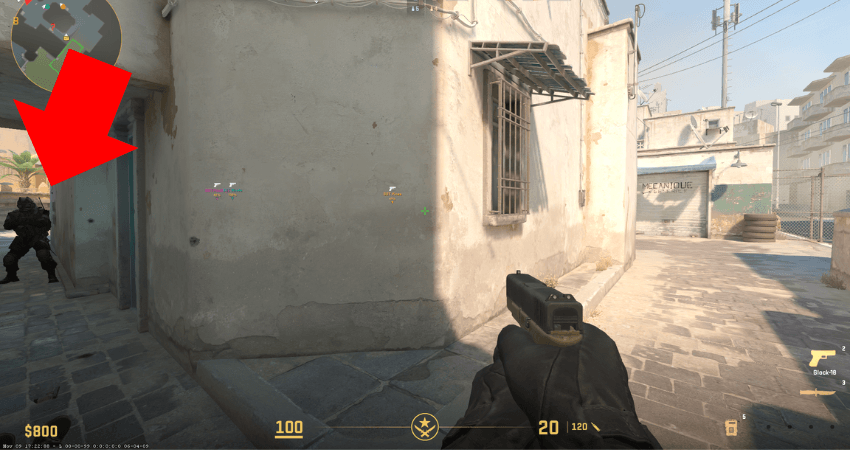
Many beginners in CS2 don’t realize this, but sound is one of the most powerful tools for CS2 players. You can use enemy footstep sounds to pinpoint their location and then sneak up on them without them having any clue. However, if you don’t have the correct audio settings, you won’t be able to use sound to your advantage in CS2. To help you with that, here is a complete guide on the best audio settings in CS2.
Basics
While there are several complex audio settings in CS2 that require in-depth explanation, many settings are quite basic and easy to understand. Here is an explanation of all the basic audio settings in CS2
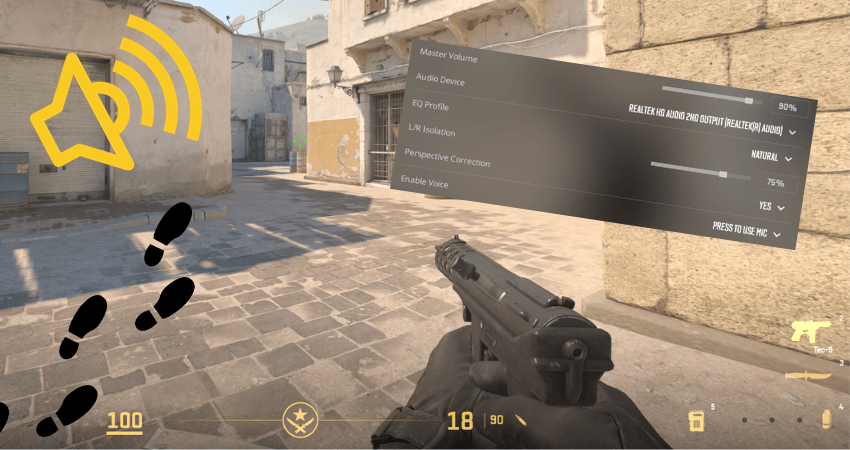
- Master Volume: This setting is for the overall audio intensity of the game, which controls how loud sound effects, music, and dialogue are.
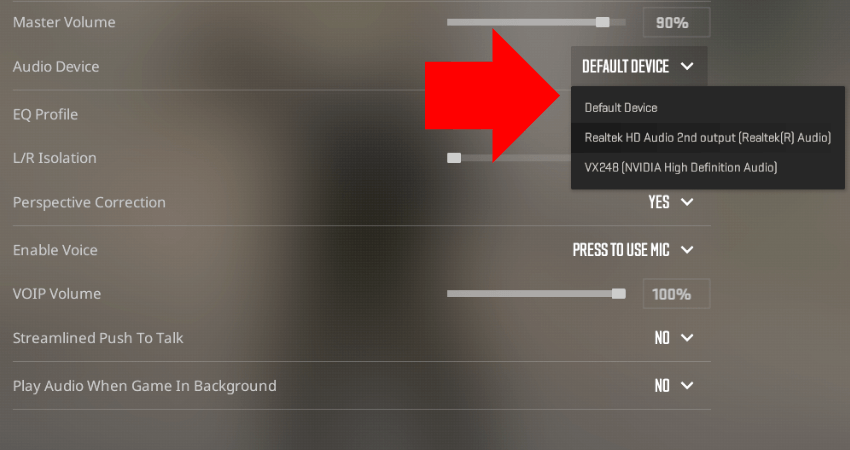
- Audio Device: This allows you to select the audio device you wish to hear in-game sounds from, like headphones, speakers, or built-in monitor speakers.
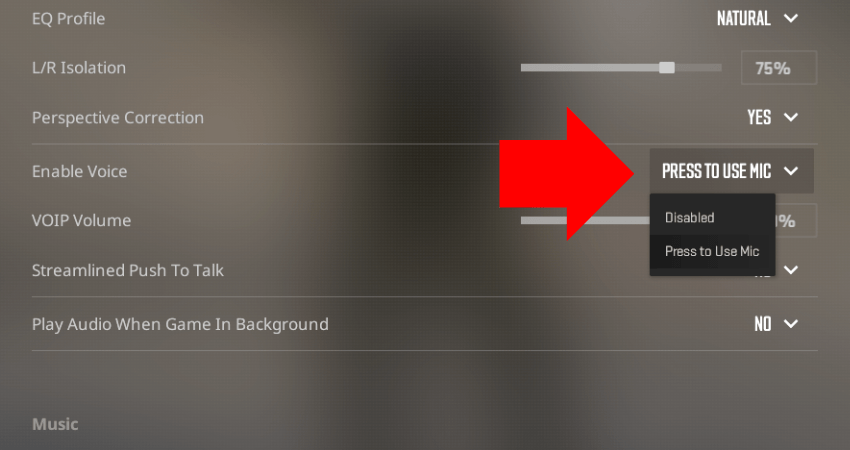
- Enable Voice: The “Enable Voice” setting allows players to turn voice communication on or off. Keeping it on is essential in CS2.
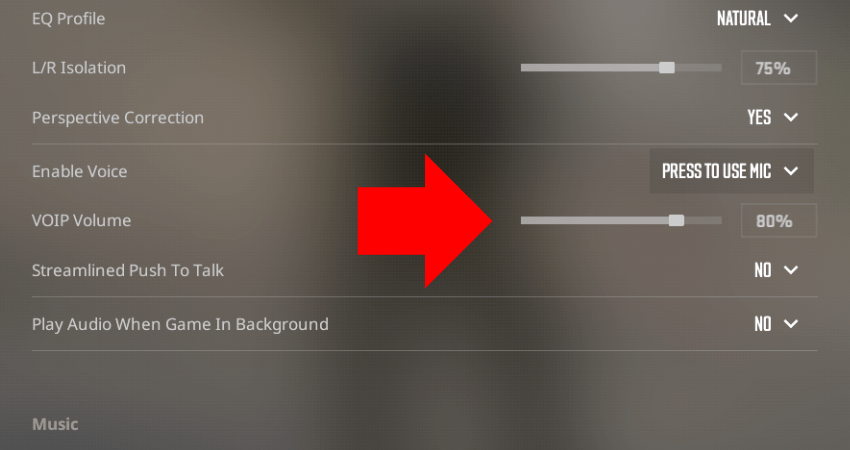
- VOIP Volume: It allows you to adjust the volume for voice communication. Lower it if you have teammates with loud mics.
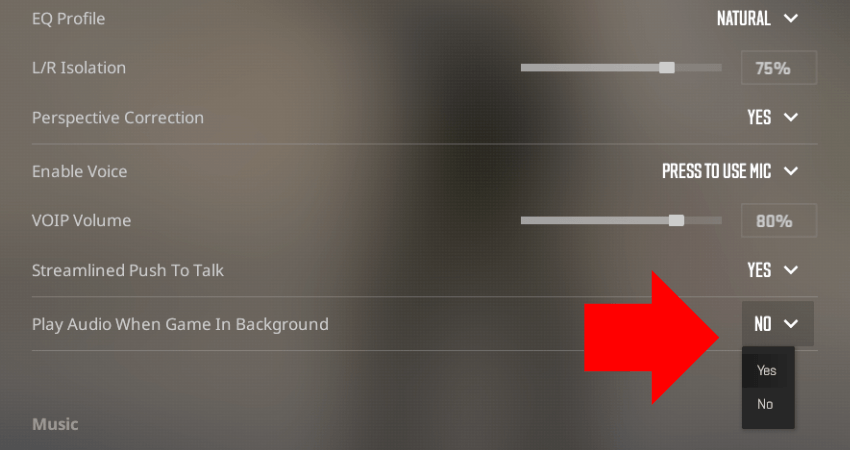
- Play Audio When Game In Background: You can select whether the game’s audio continues playing when you have minimized the game.
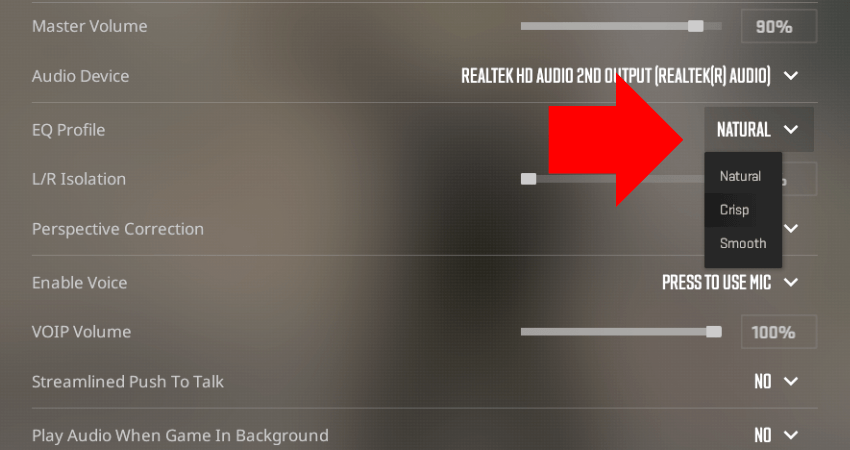
EQ Profile
For the EQ Profile setting, there are three options available. The most competitive of these options is “Crisp,” which makes all footsteps and gunshot sounds very clear. While this is also the one esports pros use, it hurts the ears a lot and isn’t suitable for longer sessions.
The most pleasant EQ Profile for long-term use is “Smooth.” However, if you set it to this option, you won’t be able to hear enemy sounds clearly. The “Natural” option is the best of both worlds, with good clarity that isn’t harsh on your ears.
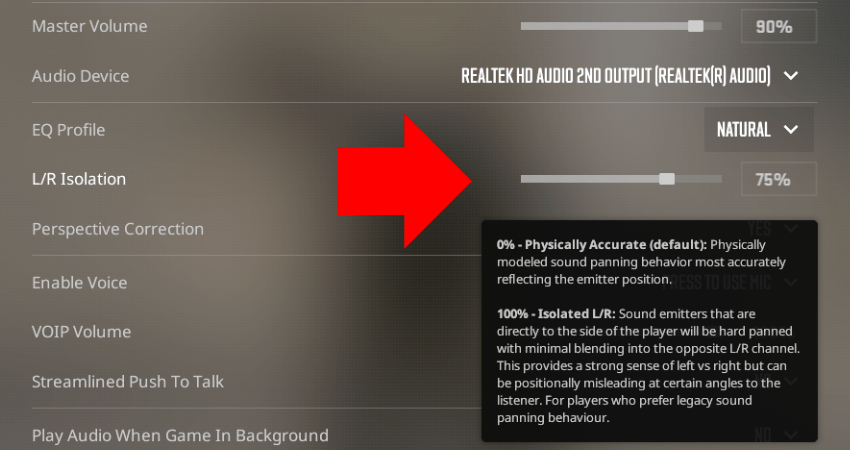
L/R Isolation
CS2 merges the left and right sounds to make the game feel more realistic or natural. However, this results in audio that offers little to no information about the positioning of the sound, which is one of the main reasons players use sound in CS2.
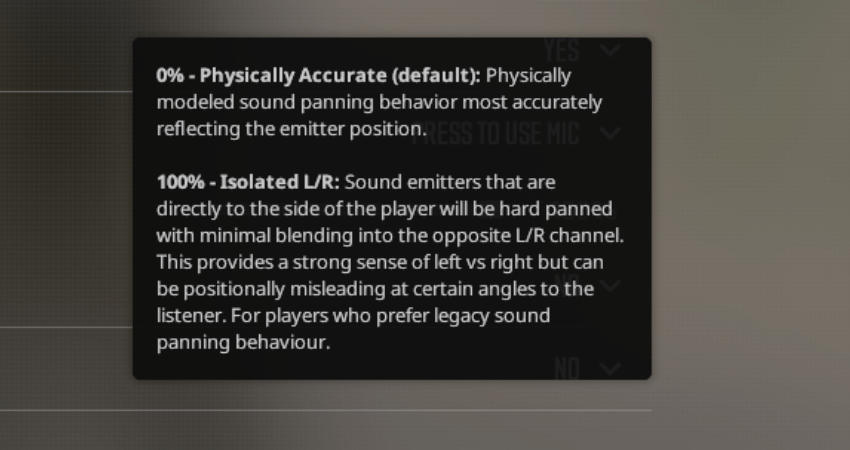
To counter that, CS2 offers a setting called the “L/R Isolation,” which isolates sounds from the left and right to make it easier for players to differentiate between the two. However, maxing out this setting will make discerning between forward and backward sounds harder, so we recommend keeping it at around 75%.
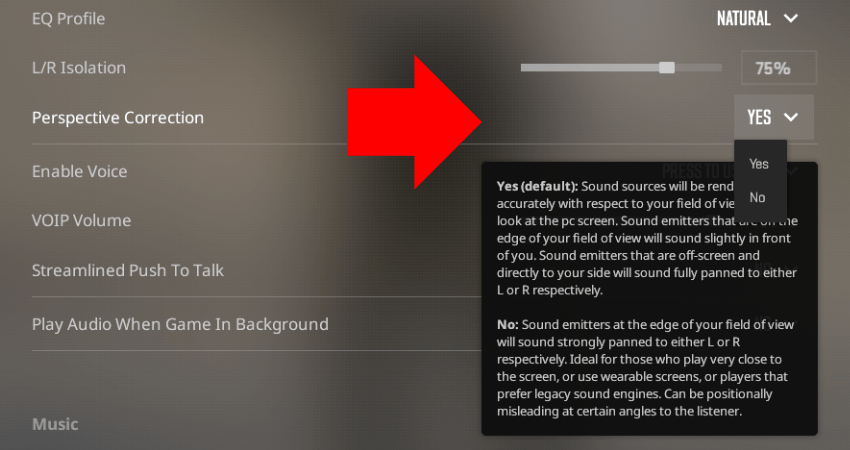
Perspective Correction
Perspective Correction is a setting that adjusts the in-game audio based on your FOV, where sounds coming from stuff that isn’t in your FOV will seem as if they are coming from behind you. It helps in-game sound feel more natural, especially for players who play on different aspect ratios and FOVs.
However, Perspective Correction makes all in-game sounds quite different from CSGO. So, if you have been playing CSGO for a long time and prefer CSGO audio, you shouldn’t use Perspective Correction, but you can still experiment with it to see what feels the best.
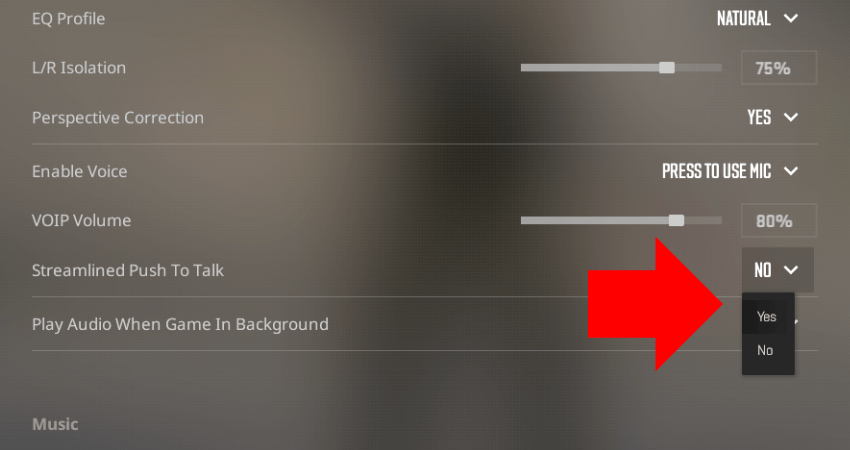
Streamlined Push To Talk
A common issue that CS2 players face is random game freezes. It usually happens when some other software disrupts your audio input device. The “Streamlined Push To Talk” setting fixes this issue by keeping your mic always activated. Keep this on, and you’ll notice a drastic reduction in random game freezes.
The Best Audio Settings in CS2 – Step-by-Step Guide
Now you know how each of the audio settings in CS2 works. To help make things easier for you, here is a complete step-by-step guide explaining how you can get the best audio settings in CS2 that help you hear all sounds.
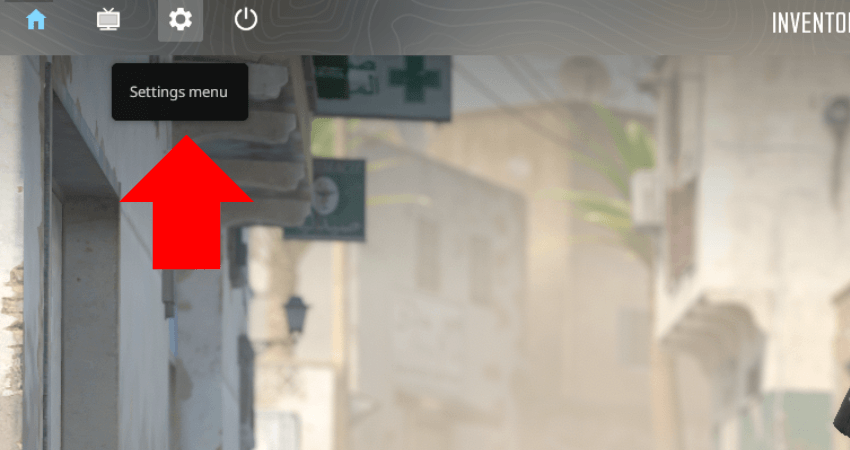
- Step 1: Launch CS2 and go to the settings menu by clicking on the gear icon from the upper left section of the home screen.
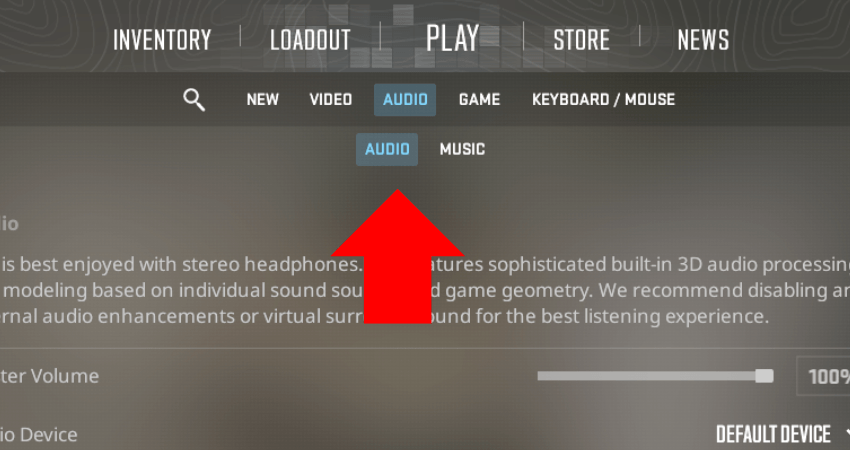
- Step 2: Click on the “Audio” tab to open the audio settings for CS2, and then again click on the “Audio” section.
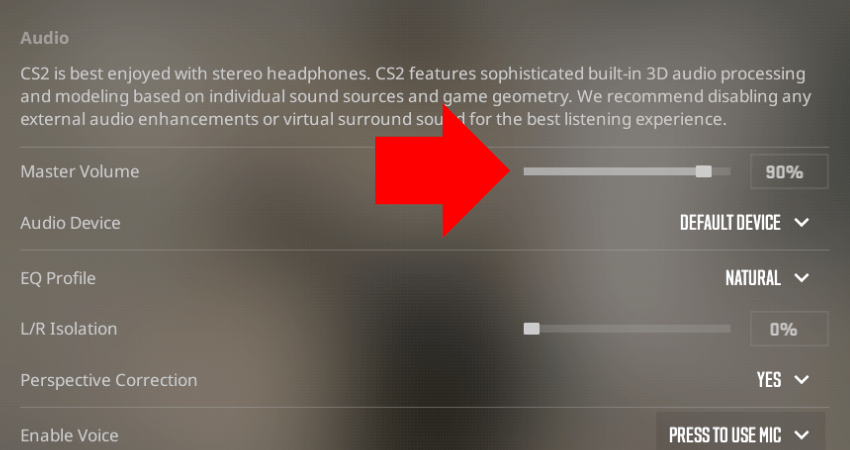
- Step 3: Set the “Master Volume” slider to the highest possible value that doesn’t hurt your ears. Most professionals set it to 100% to hear all footsteps.
- Step 4: Select your headphones from the “Audio Device” option. The game might select other speakers if you keep it on default.
- Step 5: Keep the “EQ Profile” on “Crisp” if it doesn’t hurt your ears. If it does, use it for Ranked competitive matches and change it to “Natural” for casual matches.
- Step 6: Set “L/R isolation” to any value between 50% to 100%. The closer it is to 100, the easier it will be to determine the direction of the sound, but we recommend 75%.
- Step 7: If you started with CSGO and liked the audio in CSGO, keep the “Perspective Correction” off. If you started with CS2, keep it on.
- Step 8: Set the “Enable Voice” to the “Press to Use Mic” option. Don’t turn it off since communication is essential in CS2.
- Step 9: Set the “VOIP Volume” slider from 50% to 100%. Make it closer to 50% if in-game voice chat is too loud and close to 100% if it’s inaudible.
- Step 10: Turn on the “Streamlined Push To Talk” setting. It will prevent the game from freezing randomly.
- Step 11: Set the “Play Audio When Game In Background” based on your preference. The benefit of it turning on is that you hear the next round start and can hop back into the game.
TLDR
Conclusion
CS2 offers different audio settings you can tinker around to adjust it precisely to your preferences. For some settings, like the EQ Profile, there is always a clear winner that results in the most competitive sound. However, for others, like VOIP or Master Volume, there is no single best setting since it depends on subjective factors. Fortunately, you now have all the tools to decide on those settings on your own.