What’s better, ten low-rarity-tier skins or one high-rarity-tier skin worth more than all ten low-rarity-tier skins combined? Well, that’s exactly the proposition that Trade Up Contracts in CS2 offer. If you want to learn more about them, you’re in the right place. Here is everything you need to know about CS2 Trade Up Contracts.
What are CS2 Trade Up Contracts?
Let’s say you have ten Mil-Spec weapon skins in your inventory. What if you could trade those ten skins for one Restricted weapon skin? Well, that’s what CS2 Trade Up Contracts lets players do. It’s a feature where players can use ten of their low-rarity-tier skins to get a high-rarity-tier skin in return.
The skins you get from a Trade Up Contract depend on the ones you enter. However, you can only narrow it down to a couple of skins, and it’s random after that. So, why wouldn’t someone sell their CS2 skins on the Steam community market and buy whatever skin they like?
Well, that’s because a Trade Up Contract can get you a skin worth more than the ten you entered for the trade. In other words, you can end up making a profit. However, keep in mind that the profitability of a particular Trade Up doesn’t always stay the same.
Skins Used For Trade Up Contracts
There are some requirements that your skins must meet before you can enter them into a Trade Up Contract. Firstly, they should be of the same grade. For example, if one weapon is Mil-Spec, you can’t include a Restricted tier skin. Secondly, either they all can be StatTrak or none. You can’t have both types.
Finally, you can only use Mil-Spec, Restricted, or Classified weapon grades for Trade-Up Contracts. You can’t use Covert or any rarity type above that. Also, if the skins you’ve entered are the highest grade for their respective collections, you can’t use them either.
A Step-by-Step Guide on How To Use Trade Up Contracts
To help you get started in Trade Up Contracts for CS2, here is a complete step-by-step guide on using CS2 Trade Ups.
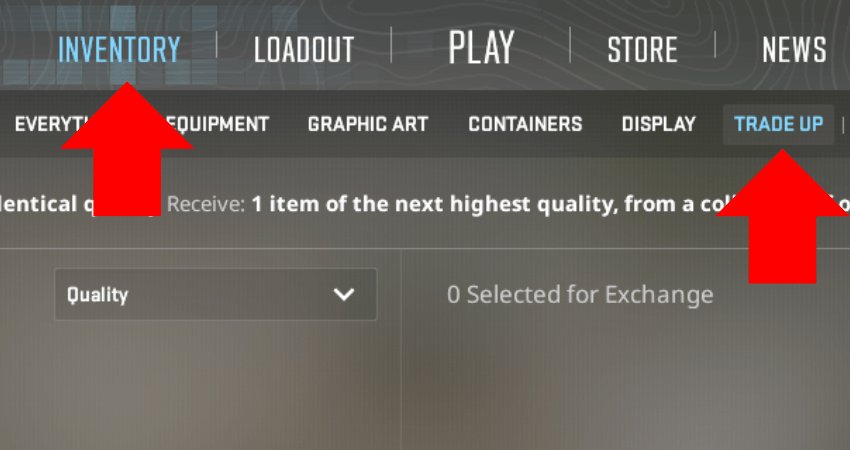
- Step 1: Entering the Trade Up Section: Launch CS2, click the “INVENTORY” option from the home screen, and select the “TRADE UP” option to enter the Trade Up section in CS2.
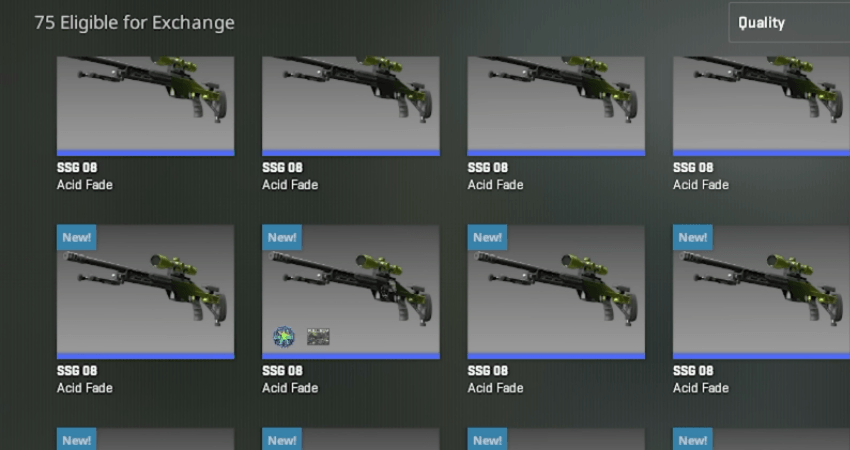
- Step 2: Choosing Skins: As you enter the Trade Up section, you’ll see all the skins from your CS2 inventory eligible for a Trade Up. Of all the skins listed here, select the ones you want to use for the Trade Up Contract. As mentioned, you need ten skins of the same weapon grade (Mil-Spec, Restricted, or Classified). Also, ensure they are all either StatTrak or normal skins because you can’t have both types in a single Trade-UP.
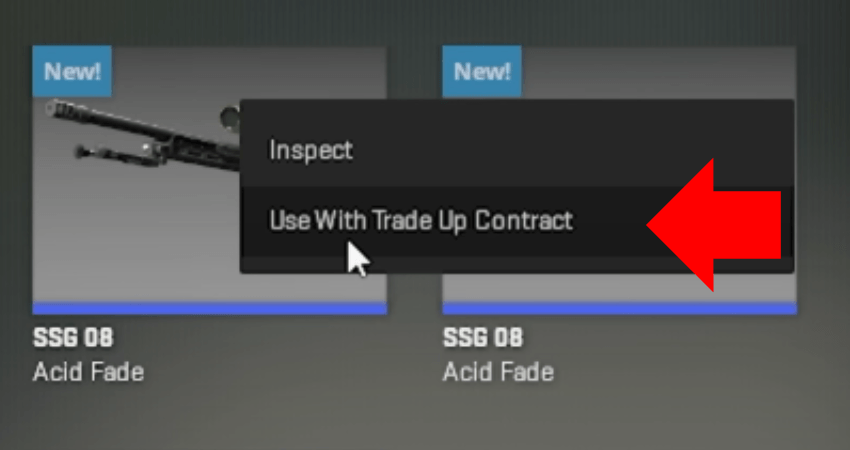
- Step 3: Adding Skins to the Trade Up: Right-click on the skins you want to add for the Trade Up and click the “Use With Trade Up Contract” option from the popup menu. Do that until you have ten skins selected for the exchange. If you want to change some of the skins from the Trade Up, the time is now. The next step will complete the Trade Up, and you won’t be able to get your ten skins back after that.
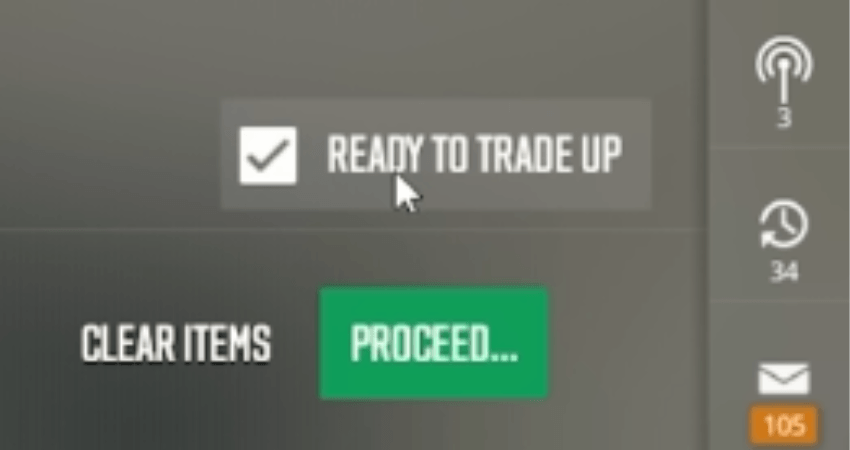
- Step 4: Proceeding with the Contract: Once you have added all the skins you want to use in the Trade Up Contract, check the “READY TO TRADE UP” option from the bottom right section of the screen, and then click the green “PROCEED…” button. As you click on the “PROCEED…” button, the Trade Up Contract will complete, and the game will display your brand new skin on the screen.
Conclusion
Using CS2 Trade Up Contracts seems like a great way to get an expensive skin for some cheap ones. However, to be effective at Trade Ups, you have to know how they work. Fortunately, you are now prepared to get into your first Trade Up Contract and get something worthwhile.